The product has been saved to the folder:
My Downloaded Products
Contact manufacturer
Enscape
Contact manufacturer


Contact manufacturer
Contact manufacturer
Enscape 4.0 marks the arrival of a seamless and consistent rendering experience for all architects and designers, regardless of their operating system.
Feature alignment across macOS and Windows means that Mac users can now benefit from a design and visualization workflow that is fast and intuitive, just like that of their Windows counterparts.
The newest version of Enscape for Mac includes:
With a revamped codebase, the latest release lays the groundwork for the future development of Enscape.
Let’s take a look at how you can use the newest features to speed up your workflows and improve the quality of your rendering outputs.
How to enable NVIDIA Denoiser for improved image quality
Through utilizing NVIDIA’s ReLAX Denoiser, it’s possible to reduce noise in image and video capture exports and improve the quality and realism of scenes.
The impact of the Denoiser is particularly noticeable when global illumination is high, and direct light is minimal, such as in enclosed interior scenes. When enabled, you’ll see crisper and more defined images, videos, and panoramas.
To activate the Denoiser, go to General Settings and enable ‘NVIDIA Global Illumination Denoiser’.
 |
How to customize 3D assets
Enscape’s built-in Asset Library comes with thousands of pre-loaded and ready-to-use 3D models, including people, vegetation, furniture, and vehicles. The library now offers customization options for Mac users:
How to change the color and materials of pre-defined assets
To identify the assets that can be customized, go to the Asset Library and select the 'Adjustable' tab.
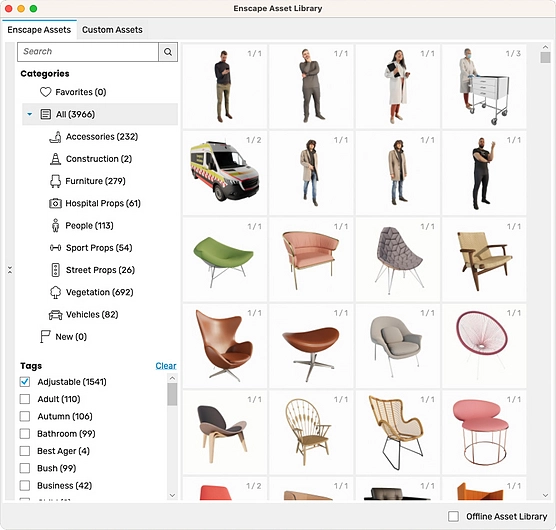 |
Adjustable assets fall into two categories: those that offer material and/or color customization, and those with variants (e.g. an asset that comes with variations, such as a chair with different leg designs).
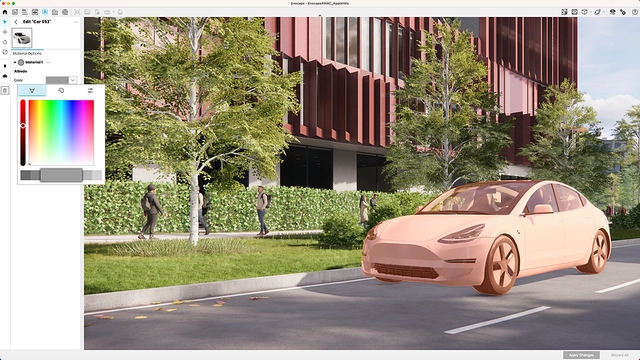
Drag and place the selected asset into your project and go to the Enscape rendering window to customize it.
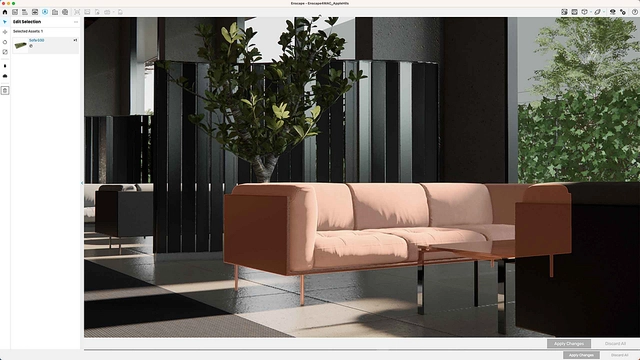 |
In the customization panel on the left sidebar, you can now make changes to the color and/or material of your selected asset.
 |
How to add custom assets
Within the Enscape Asset Library, a ‘Custom Assets’ tab allows you to upload your own assets.
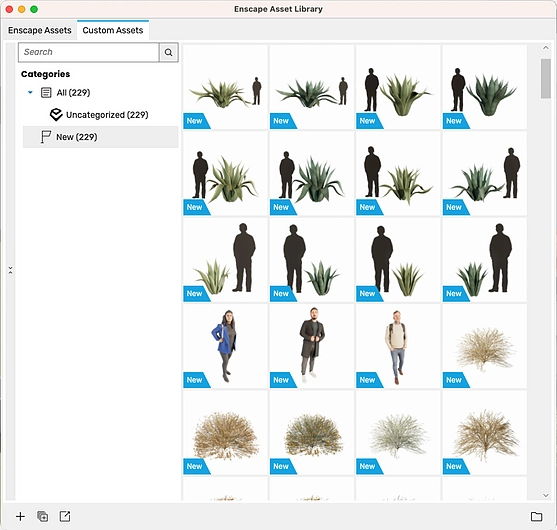 |
Click on one of the + buttons at the bottom of the window to upload either an individual asset or a batch of assets.
Low-poly assets with less than 20,000 triangles are recommended and the file formats .gltf, .obj or .fbx can be imported.
It’s also possible to organize and categorize your assets for easy accessibility. Visit the Enscape Knowledge Base to learn further tips on using the Custom Asset Library.
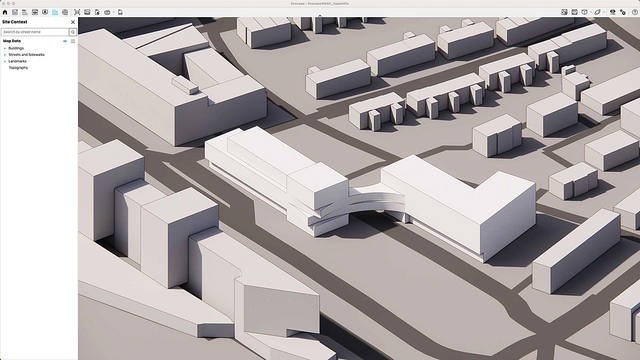
How to add site context
To add context to the surrounding area of a building in the form of low poly buildings, streets, and topography, click on the Site Context icon in the Enscape toolbar and select ‘Add Site Context’.
The default location is always set by the host design application, but you can also search for a location by adding coordinates, a street name, city, or postal code.
An area of 1000x1000 meters is set by default, but it is possible to resize and rotate.
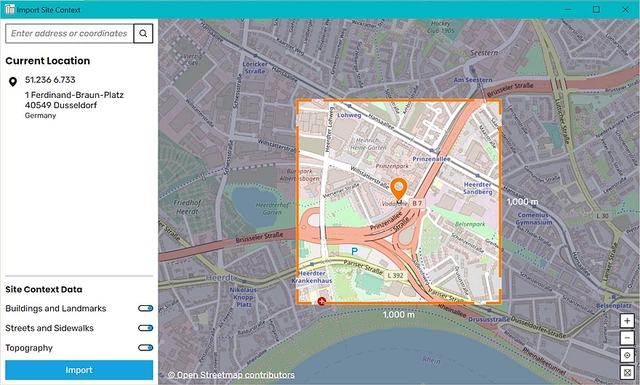 |
The orange pin on the map indicates where your project model will be placed within the site context. It’s worth noting that the site context model is only visible in the Enscape rendering window, and not in your design application.
Explore further editing options in this Knowledge Base article.
 |
Get started with Enscape 4.0
Enscape 4.0 provides architects and designers with access to a real-time visualization workflow on both macOS and Windows. Design, visualize, and share your ideas with minimal clicks and without having to leave your design application.
Enscape for Mac plugs directly into SketchUp, Rhino, Archicad, and Vectorworks. For Windows, Revit is also supported.
Update to the latest version of Enscape today, or sign up for a free 14-day trial to experience the difference an integrated real-time rendering plugin can make to your design visualization workflow.

Contact manufacturer


