
If you're reading this, you likely work in the design world, and as a result you may have heard of Scrum. It’s a design method originally introduced by Hirotaka Takeuchi and Ikujiro Nonaka in the 1980s to describe a process for product development, and later formalized for software development by Jeff Sutherland in 1995. It relies on the organization of a team and its tasks around the principles of focus and flexibility: focus on a singular task within a given time period, and flexibility in response to changing client demand, user feedback, and design challenges. Scrum keeps a project on schedule with the Sprint, where the entire team is working towards one important milestone within set dates, and continuously communicating potential impediments to hitting the deadline.
Scrum is one of the most popular project management techniques for militaries, software companies, event planners, design firms, and anyone else with a product to deliver. The most formal implementations of Scrum employ a Product Owner, who communicates and negotiates between the client and designers, a Development Team, which actually completes the tasks for the project, and a Scrum Master, who tracks team progress and facilitates daily Scrum meetings, where team members discuss their contributions and concerns.
Central to the process is the Scrum board, which serves as a visual tool for organizing tasks and following the team’s progress. Each task is written on an individual card or sticky note, and placed in the appropriate column for “backlog,” “in progress,” and “complete.” There are apps and websites to make them digitally, but nothing beats the feeling of physically picking up a task and moving it to the “done” section. Even if you’re not part of a Scrum team, you can use a Scrum board for your own projects at school or work to help prioritize, plan, and keep yourself accountable when juggling multiple timelines and responsibilities. The following guide will help you set up and customize a Scrum board to design a workflow that will keep you on task, while being flexible enough to respond to a changing schedule.

1. Decide on your space. Ideally, your Scrum board will be immediately visible in your workspace, large enough to accommodate a barrage of tasks, and permanent enough to remain intact for an entire project cycle (or more). A wall near your desk or a large whiteboard are great.

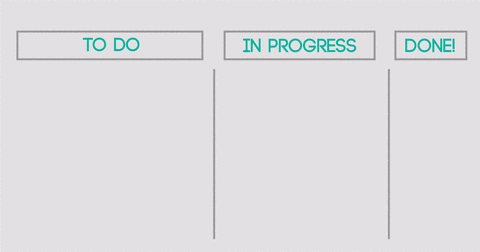
2. Design your board. Think about the scope of work the board will be helping you organize. You can use a combination of columns, rows, and colors to represent different information. At its most simple, your Scrum board should have three columns: To Do (or Backlog), In Progress, and Finished. In Scrum for software, a fourth column on the leftmost part of the board is labeled “User Stories,” which outline concrete goals for the software’s functionality, each with its own list of tasks. For architectural projects, you can choose to adapt this fourth section for different components of the design process, different subjects in school, or any other categorical breakdown you find useful.
For more specificity and visual clarity, you can add even more columns between In Progress and Finished, such as Testing or Awaiting Approval. You can also use colors to denote urgency or type on each task card. Make sure your To Do column is large enough to fit all of your backlogged tasks!

3. Gather your materials. You will need task cards and progress titles, but you may also want a grid for your rows and columns. Depending on your ownership of the space and the surface you’ve chosen, you could use anything from painter’s tape to actual paint for your columns, and sticky notes, magnetic note cards, or even legos for your tasks.
4. Set up your board. Place labels for each column on the top row. You can use tape to create a grid, but you can also create a clean look with only the alignment of your task cards.

5. Use it! Translate each incremental, concrete goal you have into a task or story. Set your deadlines, and then move tasks into your progress column. The purpose of Scrum is to dedicate your time to only this focused selection of tasks, complete them by the deadline, move them to the completed column, and then move forward new ones from your backlog.
You can experiment with using your Scrum board as a negotiation device for yourself, your clients, or your boss. Having a visual marker of your workload can help you ask whether you really can or should be reprioritizing the tasks you already have in progress.