From sunny to stormy, and day to night, with V-Ray
Image credit: Jiří Matys
Artist Jiří Matys used V-Ray for 3ds Max to transform a day scene into a dramatic rainy night. He reveals his secrets for creating glass, grass, and greenhouses.
Jiří can turn his hand to anything. The freelance artist has created stunning interior and exterior renders and everything from cartoon snowmen to dinosaur skills. Jiří's always looking to improve his skills, so he used a recent project involving a modular greenhouse system to see if he could plunge a serene daytime scene into a stormy night.
Here, Jiří guides us through creating the scene with V-Ray for 3ds Max—and then how he switched the daylight off.
Modeling
The greenhouse, which dominates the scene, is made of prisms and joints in a modular system—so creating it was easy. He used chamfer everywhere to round the edges and create nice reflections. Jiří manually moved the UVs on every prism or used scripts for randomization, so they didn't all have the same textures, which would have stood out in the render.
Image credit: Jiří Matys
V-Ray 5's UVWRandomizer map makes it easy to randomize textures. All he had to do was create a simple wood texture and use the VRayUVWRandomizer map on top to generate its placement on all prisms. It's straightforward and fast. Here are my randomization settings:
For the polycarbonate greenhouse "glass," Jiří used enough polygons to ensure a realistic reflection of the sun and surroundings. He also used the Shell and Chamfer modifiers to add curves to the edges between the wall and roof and round all the glass cover edges. He also modeled a screw with a washer which he cloned across the greenhouse to hold the glass on.
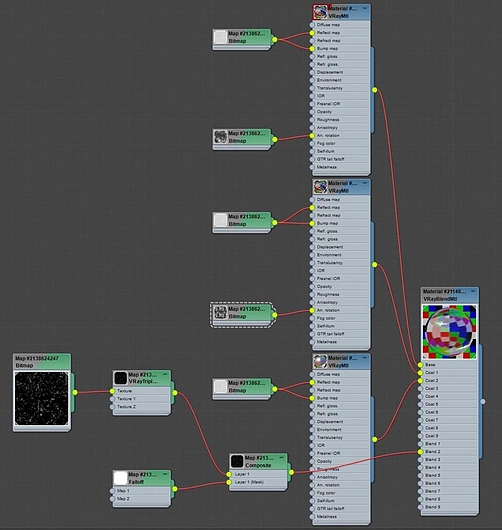
Materials and references
Polycarbonate has a unique look because its fine grooves give it a reflective but irregular surface. Jiří used many references to get it right.
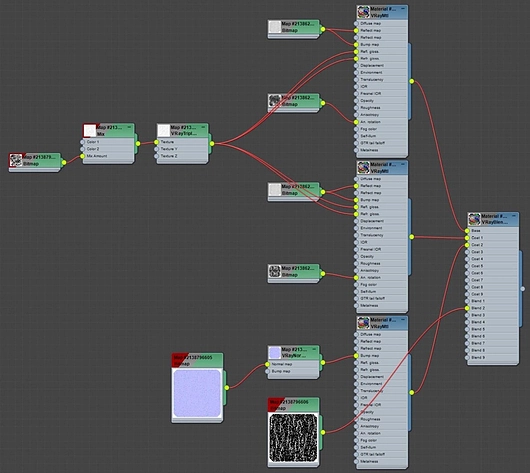
A VRayBlend material with three V-Ray materials helped me achieve the right look: Jiří applied a fine-line texture in the reflection and bump of the base material, which was also the most reflective and transparent. To break up an otherwise perfectly straight reflection from the sun, he used a black and white texture in Anisotropy Rotation and set the Anisotropy to 0.7.
The second V-Ray material is the same, but he added a modified texture in Anisotropy Rotation for a more realistic look.
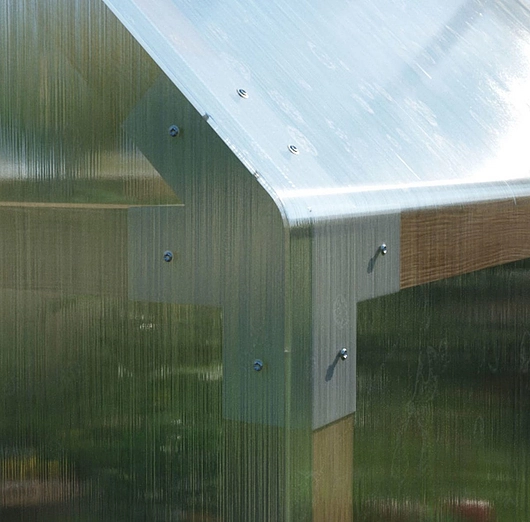
Image credit: Jiří Matys
The final V-Ray material simulates dirt. It only has partial transparency and reflection, with a lowered intensity. He used the dirt texture as a VRayBlend mask to create this material and then masked it further with a Falloff map.
In the real world, dirt would fall mainly on top of the greenhouse with less on the sides. To achieve this, Jiří used the Perpendicular/Parallel, World Z-Axis, and Mix Curve, and he tried to create the entirety of the material procedurally for quick changes and modifications. When he made the night scene, Jiří switched the dirt material for a layer of raindrops, with droplet textures from Poliigon.
To add a worn-out and old look to the flowerbeds, he made their stone edges broken and crooked. he even created a gap with soil spilling out. It was all quick and easy to model, but it makes the image look far more authentic.
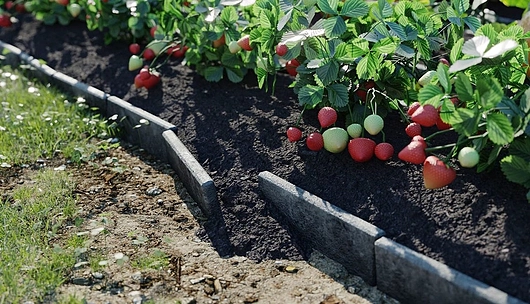
Image credit: Jiří Matys
Lighting
Jiří kept the day-scene lighting very simple with two Dome lights. Because the HDRI Haven map he used illuminated the scene nicely, he set the first Dome light to Invisible so you can't see it, but it helps light the trees in the background. Jiří left the Affect diffuse, Specular, and Reflections options unchecked on the second Dome light. This way, it doesn't affect the scene, but you can see it in the background as the sky.
V-Ray and camera settings
Jiří used a Physical Camera from 3ds Max to snap the scene. He used a fish eye effect for the greenhouse interior shot, which is easy to set up, but you must change some parameters for a great composition. He set the camera's Focal Length to 35mm; in the V-Ray settings, he set the camera to Fish eye, unchecked the Fish eye auto-fit box, set the Fish eye dist to 1.1, and the Fish eye curve to 0.83.
In V-Ray 5, the VRayPhysicalCamera's new EV parameter can change settings without altering the image brightness. Jiří used basic V-Ray settings elsewhere, using BF + LC, and as a type for LC, he set Hash map, which is the best quality. The image was calculated via a progressive image sampler with the Noise Threshold set at 0.004.
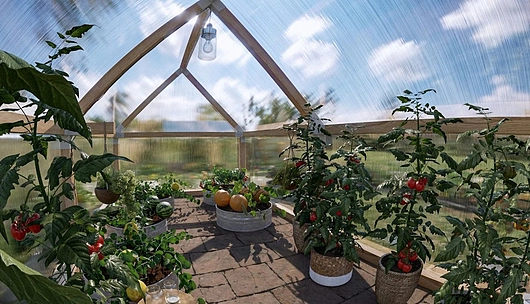
Image credit: Jiří Matys
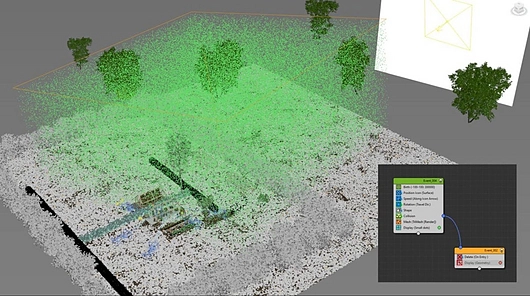
He was happy with the day scene and decided to do a night version as well. Jiří decided to light the exterior with intense cold lightning to contract the warm glow from within the greenhouse. tyFlow proved perfect for creating the rain. The flow in the image includes 300,000 particles, -100 at the highlighted object's location, which covers the main space of the scene. The whole scene, up to the ground, is covered in rain in frame 0. He set the ground and greenhouses as collision objects that erase particles when they touch to keep the rain outside.
To add the fog, I used VRayEnvironmentFog and an Atmospheric Render Element. To keep processing times down, he didn't texture the fog but he later edited it in Photoshop.
Lighting the night
Jiří used several lights to illuminate the night scene. He placed a spherical light in the greenhouse and on all the candles. The most important are the three lights you can see in the image. The first light only simulates the lightning's reflection on the grass and does not have a diffuse component. He set the Directional parameter to 0.95 aimed it from the lightning flash towards the grass.
The second light is for the volumetric fog, and the third is large and illuminates the rain. To get the settings right, he made use of real-time IPR with Debug Shading. In V-Ray 5, this process is even more accessible and faster thanks to Light Mix, which works well and saves a lot of work.
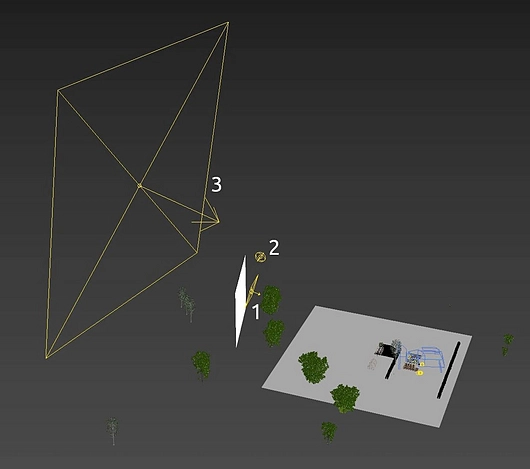
To create the reflection of the lightning in the greenhouse and droplets, Jiří used a white rectangle, hidden from the camera, with a mapped texture of lightning.
Post-production
For post-production, he used a standard Beauty pass and an Atmospheric pass for fog. In the V-Ray Frame Buffer, he used Highlight Burn to suppress bright spots and used LUTs from the 3DCollective collection. This is even simpler in V-Ray 5, with more settings for Filmic tone mapping and layer options.
Jiří also used Photoshop's Camera Raw filter and added finer details with curves, levels, sharpening, hue, saturation, and LUT. Check out this video for more.
Go dark — and light again with V-Ray for 3ds Max.
Download your free 30-day trial.


