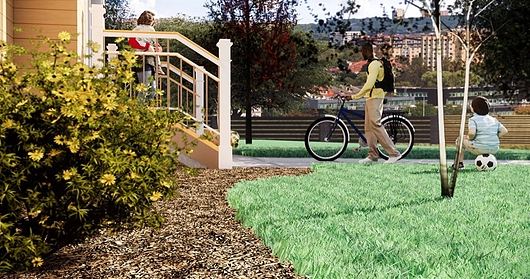
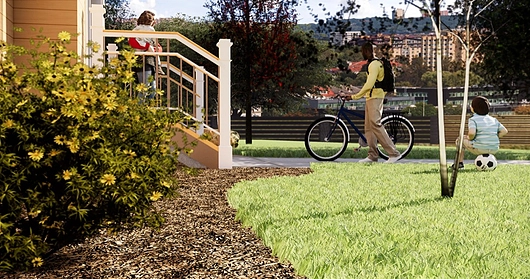
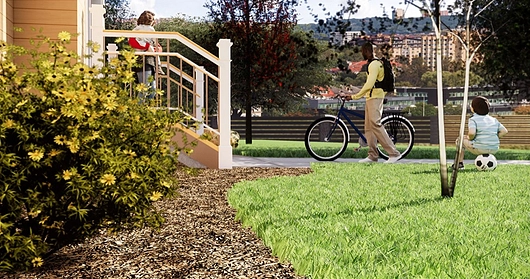
Representing grass is a challenge in architectural graphics, especially for the average designer not specialized in developing computer-generated graphics (CGI). The best results in the past came from applying a bump map and maximizing the setting, so the ground did not look completely flat. Then, Enscape totally changed the game in early 2017 by automatically adding three-dimensional grass within their real-time photorealistic rendering engine. And now, it just got better, as architects have been given control over the height and height variation of the blades of grass.
Any material in Revit, SketchUp, Rhino or ArchiCAD with the word “grass” in its name will render as a thick three-dimensional-looking grass in Enscape by default. It is easy to see what a big difference this makes. This article focuses on Revit and SketchUp to cover the ins and outs of the grass feature in Enscape, including new developments.
Grass in Revit
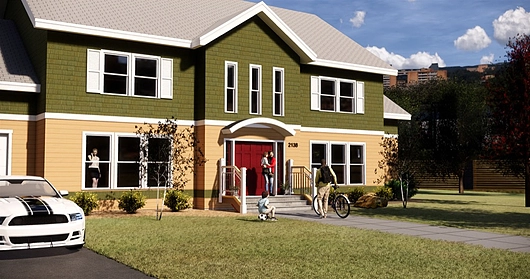
Using Autodesk Revit, we can achieve amazing results in Enscape using various materials to define grass.
Grass Height
The magic happens when Grass Rendering is ticked within the Enscape settings dialog and one or more Revit materials have the keywords “grass”, “short grass”, “tall grass” or “wild grass”.
Here is what happens based on keywords used:
- Grass: Medium grass
- Short Grass: Shorter grass
- Tall Grass: Taller grass
- Wild Grass: Taller grass with varying blade heights
The keywords are not case sensitive, but you cannot change the order, e.g. “grass tall” is not the same as “tall grass” to Enscape.
Grass Color
Because Enscape samples the color or texture assigned to the material, we can achieve interesting results. A texture with subtle variations in color tends to translate nicely to Enscape’s 3D grass.
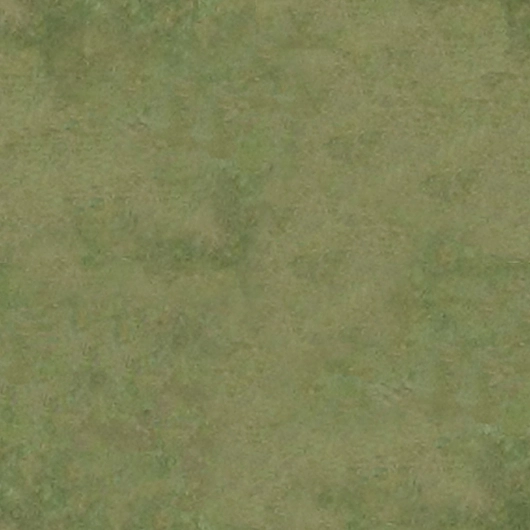 |  |
| Texture with variation in color | Grass rendered using texture |
Grass Types
It is easy to create specific grass types. In this example, an image of the desired grass types were applied, with a texture size of about 8-12” wide and 4-5” tall to produce the desired results. Of course, finding larger tileable samples would produce better results and look correct in Revit if ‘realistic view’ were ever used.
 |  |  |
| Grass Type: Bermuda | Grass Type: Centipede | Grass Type: Zoysia |
Grass in SketchUp
When working in SketchUp we have all of the options just covered for Revit and a few more. In fact, because of the Enscape-centric material editor and ability to place a custom proxy object, some designers will export their Revit models to SketchUp to finish the rendering task there.
Notice in the Enscape Materials dialog the Type is set to Grass and there are two sliders; one for Height and another for Height Variation. You can quickly set the material type to grass via the dropdown menu. The grass settings are only visible if the type is set to grass. Use the Height slider to adjust how long the grass is. The Height Variation slider adds variation to the height and size of the grass blades. The higher the amount of height variation, the wilder your grass will look. If you would prefer a more uniform appearance, set the slider to a low value.
When setting the material via keyword, the type is automatically set to grass because the SketchUp material name has the word ”grass” in it. But, we can also manually change the name if needed. In this model, there were a few materials with the words “vegetation” and “grass” in the same name. Those materials default to Vegetation so the names must be changed manually or the type needs changing.
Sports Examples
If you design sports stadiums or athletics fields for educational institutions, you will be happy to know Enscape can produce extraordinary results for this application.
In this SketchUp model, each grass color is a different material. The material was created by setting the type to grass and adjusting the height and variation sliders to zero. Just five minutes into opening this model the result was a photorealistic model in real-time, which even adjusted the time of day.

Thinking Outside the Box
For example, the grass texture can be used to create carpets with good results. There are likely many ways in which this versatile material can be used. However, keep in mind it cannot currently be used on vertical surfaces.


