How to Attach Ceiling Panels to Rondo Rail | Fastmount™
  1. ArchDaily
  2. Products
  3. Hidden Joints
  4. How to Attach Ceiling Panels to Rondo Rail

How to Attach Ceiling Panels to Rondo Rail | Fastmount™

How to Attach Ceiling Panels to Rondo Rail How to Attach Ceiling Panels to Rondo Rail How to Attach Ceiling Panels to Rondo Rail How to Attach Ceiling Panels to Rondo Rail How to Attach Ceiling Panels to Rondo Rail How to Attach Ceiling Panels to Rondo Rail How to Attach Ceiling Panels to Rondo Rail How to Attach Ceiling Panels to Rondo Rail How to Attach Ceiling Panels to Rondo Rail How to Attach Ceiling Panels to Rondo Rail
  • Available in

  • Use

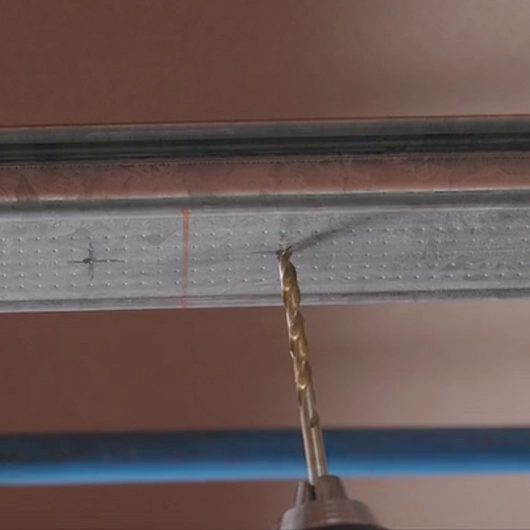
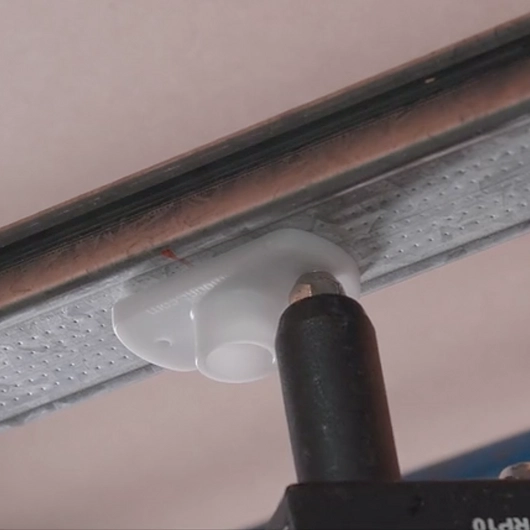
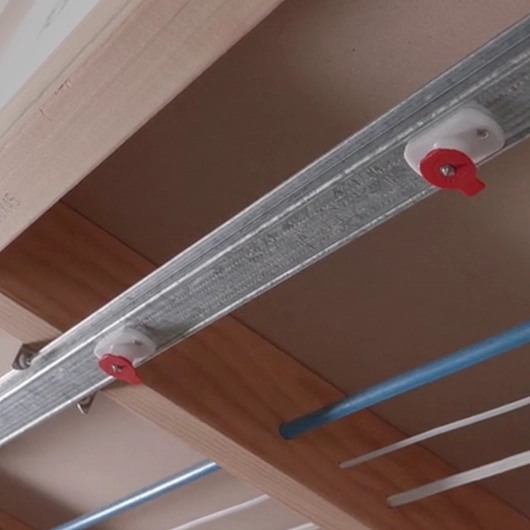
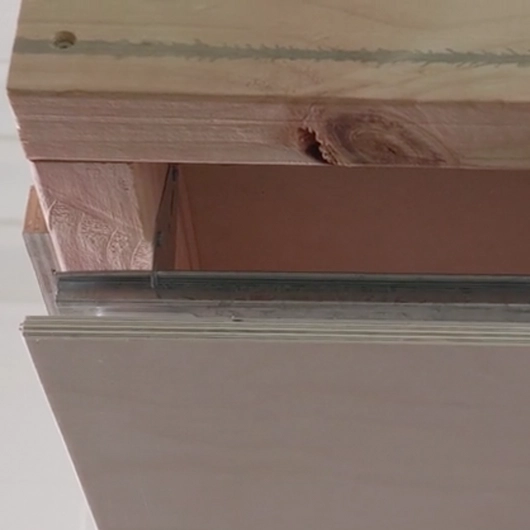
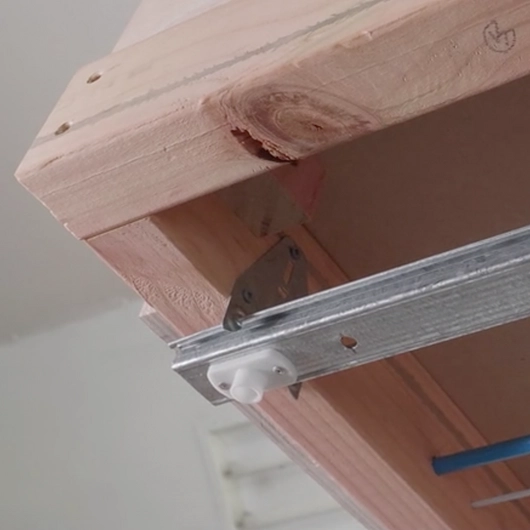
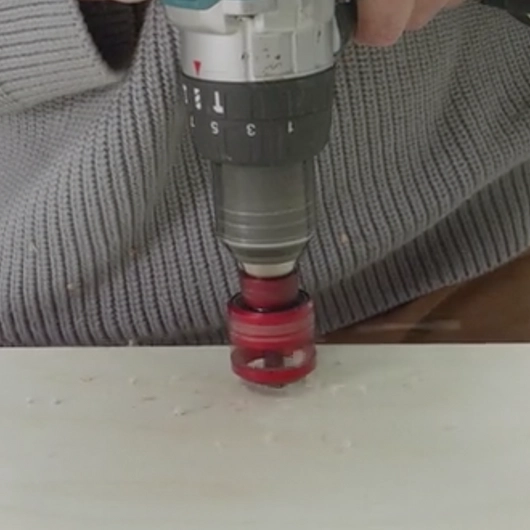
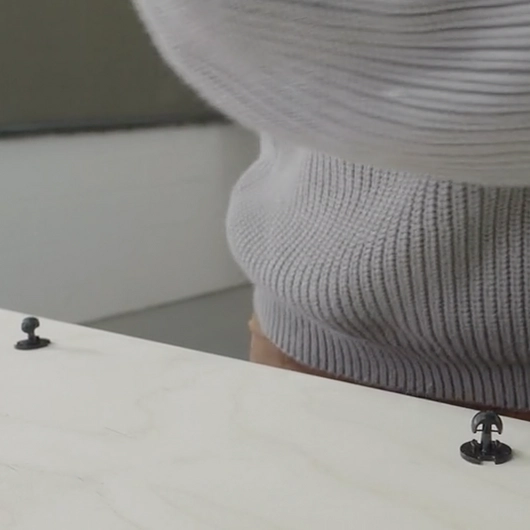
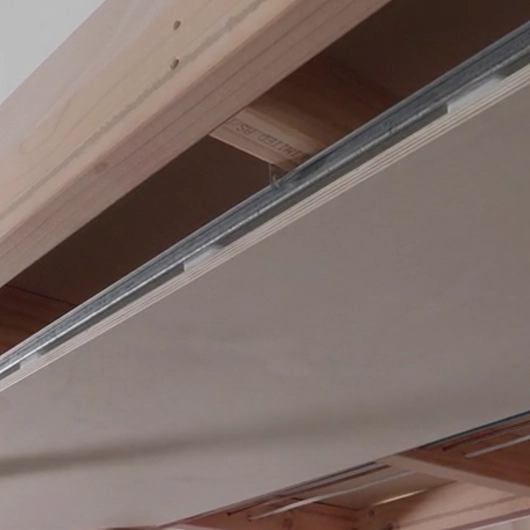
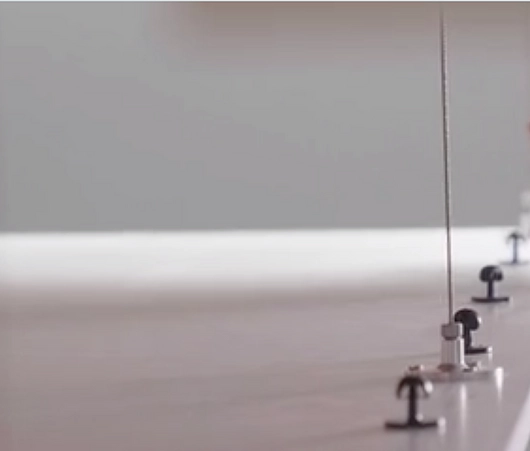
    Ceiling panel installation
  • Applications

    Ceiling cladding
  • Characteristics

    Easy installation, few components, removable, hidden fasteners, interchangeable clips, installation and removal tools supplied
  • Format

    Installation kit

1 Product File

By downloading any file you agree to the Terms of Use, Privacy Policy and to the communication of your data to the brand from which you download catalogs and files.

2 General Catalogs

By downloading any file you agree to the Terms of Use, Privacy Policy and to the communication of your data to the brand from which you download catalogs and files.
The product has been saved to the folder: My Downloaded Products
Fastmount™ Logo

Contact manufacturer

Fastmount™

Fastmount™ Logo

Contact manufacturer

Fastmount™

More from Fastmount™

Website

More about this product

This how-to describes using Fastmount™ parts to mount a ceiling panel, in this case, a Birch Select by Plytech 12mm panel to a Rondo® Metal Batten. This ensures access to wiring and plumbing behind the Fastmount™ standard range mounted to Rondo rails.

Tools
  • Rivet gun
  • Blind rivets 4.4
  • CT-09
  • CT-09DG
  • CT10
  • CP-01ST
Clips
Panel

Birch Select by Plytech 12mm panel

Substrate

Rondo® Metal Batten

Installation Steps

  1. Having marked clip spacings with FM TD-12 Guide, drill out holes for rivets in Rondo rail to suit a 4.4 blind rivet
    undefined
  2. Using the rivet gun, rivet PC-SF1 to the Rondo rail
    undefined
  3. Insert CT-01ST centerpoints into all PC-SF1 clips
    undefined
  4. With a second person sustaining the other end of the panel, align the panel into position and press firmly to mark clip positions
    undefined
  5. Remove all centerpoints from PC-SF1 clips
    5. Remove centerpoints
  6. Take the panel to a bench and use CT-09 and CT-09DG to drill put point marks on the back of the panel
    6. Drill points
  7. Use CT-10 to install PC-M2H male clips into the panel
    7. Install male clips
  8. With a second person, offer the panel up to the frame, aligning male and female clips, and push it into place
    8. Push panel into place

The Fastmount™ panel mounting system uses interchangeable clips. Installation and removal tools are supplied.

Installer's tip: When using Fastmount™ on ceiling panels, it is recommended to use PanelSafe fittings.
Recommendation: Use PanelSafe fittings

Product gallery

Latest Catalogs and Files

By downloading any file you agree to the Terms of Use, Privacy Policy and to the communication of your data to the brand from which you download catalogs and files.
See All
Fastmount™ Logo

Contact manufacturer

Fastmount™

Fastmount™ Logo

Contact manufacturer

Fastmount™

More from

Fastmount™

Website

Contact manufacturer

Fastmount™ Logo

Contact manufacturer

Fastmount™

Related Products

View more related products »
How to Attach Heavy Panels with Hidden Fixings

How to Attach Heavy Panels with Hidden Fixings

Fastmount™
Panel Mounting in Private Residence

Panel Mounting in Private Residence

Fastmount™
Contact us