Ideal House is a digital platform designed to simplify and enhance the way interior and architectural projects are conceived, visualised, and managed.
Client consultations often require presenting several design directions for the same space. This guide covers a workflow for generating multiple style variations, testing material and furniture options, and assembling a visual presentation package, all from one photograph of the existing room. The process replaces manual mood board assembly and preliminary rendering with AI-generated concept visuals.
1. Photograph the Existing Space
Capture the room from one or two key vantage points. Use natural lighting where possible, and shoot at chest height to approximate a standard perspective view. The photo does not need professional lighting or composition since the AI processes standard smartphone images. Upload the image to the Ideal House platform.
2. Generate Style Variations with the Interior Remodel tool
Open the Interior Remodel tool. Upload the room photo and select the first design style to apply, for example, Scandinavian. The AI analyzes the room geometry and generates a redesigned version in that style while maintaining accurate proportions. Repeat for 2–4 additional styles (modern, japandi, industrial, mid-century) to create a range of concepts. Each variation serves as a distinct design direction for client review.
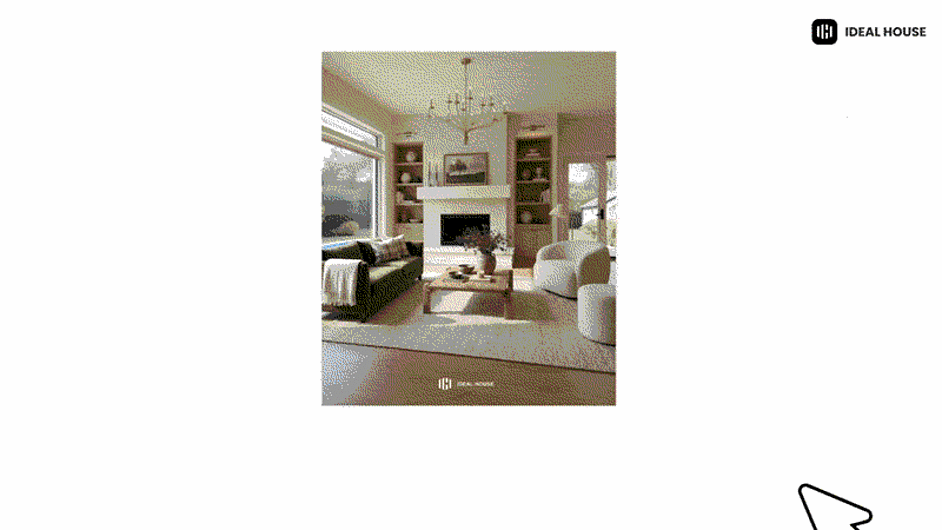
3. Generate Decor Concepts with Home Decor Ideas
Open the Home Decor Ideas tool to generate visual moodboards for the project. Describe a decor concept through text input or upload reference images, and the AI renders that concept applied to the room. Use this to test color palettes, material combinations, and spatial arrangements before sourcing physical products. Multiple concepts can be generated from the same room photo, providing a library of inspiration references for client discussions and specification development.
4. Refine Material Selections with Texture Replacer
Once the client narrows the style direction, use the Texture Replacer tool to test specific materials. Select the flooring surface and apply the candidate materials to see each rendered in the room with accurate grain, reflectivity, and lighting behavior. Repeat for wall finishes, countertops, backsplash tiles, or upholstery fabrics. This produces side-by-side material comparisons within the actual room context rather than on isolated swatches.
5. Replace Elements with Text Instructions
Use the Smart Replacer tool to modify specific elements within the room using text descriptions. Type instructions such as “replace the sofa with a mid-century walnut-frame sofa” or “swap the pendant light for a brass globe fixture.” The AI processes the text prompt and substitutes the specified element while preserving the surrounding room context, lighting, and spatial relationships. This supports iterative design workflows where clients request targeted adjustments without regenerating the full room design.
6. Test Paint Colors and Surface Finishes
Use the Room Visualizer to apply specific paint colors to walls, test tile patterns on floors, or preview finish materials on cabinetry. This provides a quick surface-level preview before committing to material orders or paint selections.
7. Evaluate Furniture Scale and Fit
For specific product recommendations, use the Furniture Try-On tool. Place a particular sofa, coffee table, or shelving unit into the room photo to check that scale, proportion, and visual weight work within the space. This verifies that product specifications translate correctly to the room's dimensions.
8. Visualize Floor Plans in 3D
If the project involves spatial layout changes, use the AI Plan Visualizer to convert two-dimensional floor plans into three-dimensional perspective views. Upload a plan drawing, select a design style, and the tool renders interior or exterior views that communicate spatial quality, material finishes, and lighting conditions. This bridges the gap between technical drawings and client-facing visual presentations, allowing clients to understand proposed layouts before construction begins.
9. Compile and Present
Assemble the selected concept images, material comparisons, and furniture options into a visual presentation. All outputs are high-resolution and suitable for screen-based presentations, PDF proposals, or printed design boards.
The result is a multi-option design presentation built from a single room photograph style explorations, decor moodboards, material comparisons, element replacements, color tests, furniture evaluations, and 3D plan views ready for client review, without manual rendering or physical sampling.
Ideal House is an AI-powered home design and visualization platform with 3M+ users across 160+ countries. It is available on web, iOS, and Android. Its 19 AI tools range from interior design, exterior renovation, landscaping, floor plans, staging, and product visualization.
Explore Ideal House's product catalog or visit their website for additional information.