STACBOND® offers a few variations as construction systems for composite panels. Follow these installation steps
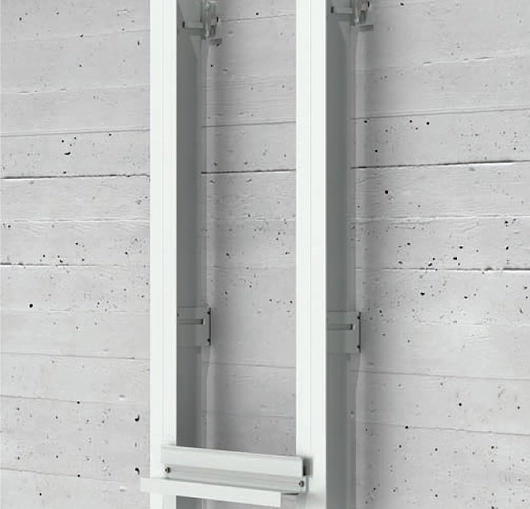
STACBOND® Assembly System - Substructure
Each panel system is available in two different variations of its substructure:
- Profile T - offers a great advantage in material and weight savings.
- Profile Omega - offers the possibility of combining with other curved modulation systems in the vertical of the facade.
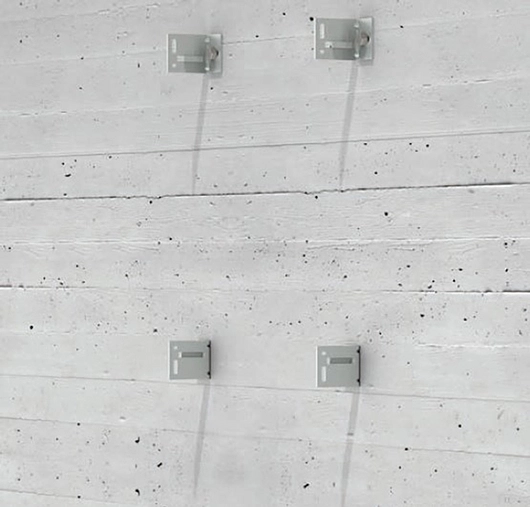
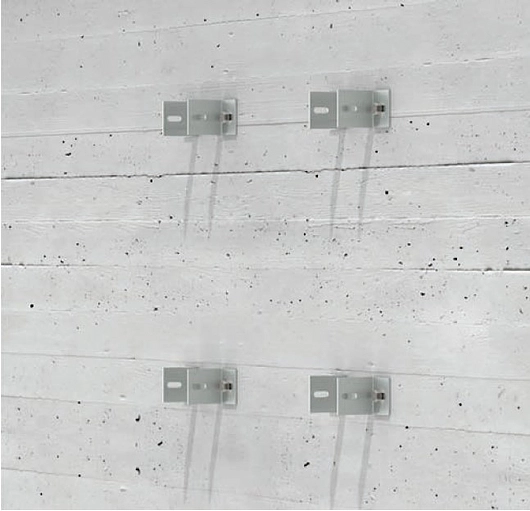
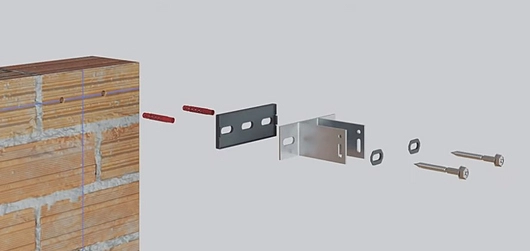
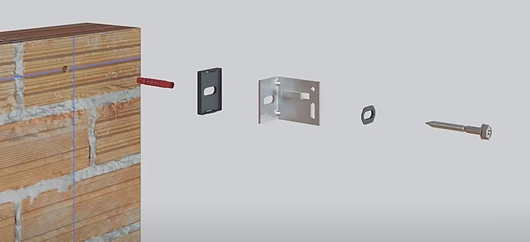
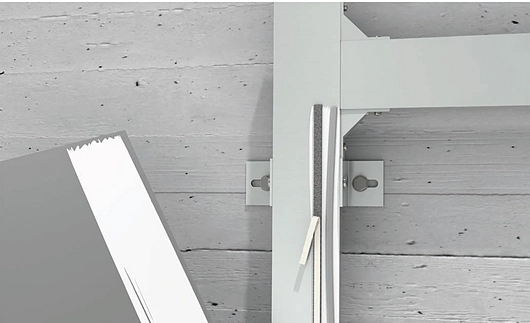
Spacers
- Use laser level to find setting out point
- for the Profile T assembly system: Drill a hole at setting out point 2cm away from the axis. For the Profile Omega assembly system: Drill two holes at setting out point 2cm away from the axis on either side (4cm apart).
- Place fastening and upper spacer with insulating wedge in the drilled hole (in the following order: Mechanical dowel/s, wedge, spacer*, groove washer/s, screw/s). Profile T makes use of Spacer-L, Profile Omega makes use of double T Spacer. There are different legnths available for the spacers.
- Install all the spacers at set distances on facades. (Certain spacers are to be turned 180 degrees for Profile T system).
Openings
- Seal all perimeters of openings using waterproof sealing tape and place finish profiles and drainage trough around openings.
Insulation
- Place insulation on facade up to the height of the fireproof insulation, cutting slits for spacers to fit through. Place fastenings for insulation to secure it.
- Fasten the fireproof insulator at set height, creating a transverse barrier.
- Cover the rest of the facade with insulation.
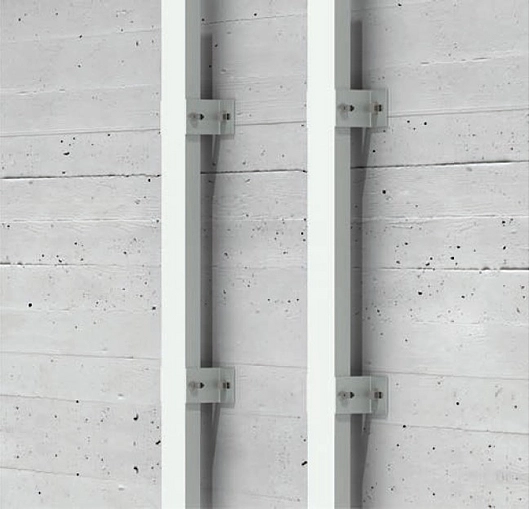
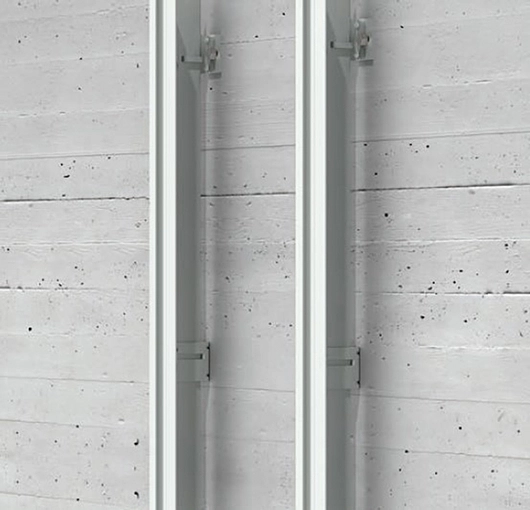
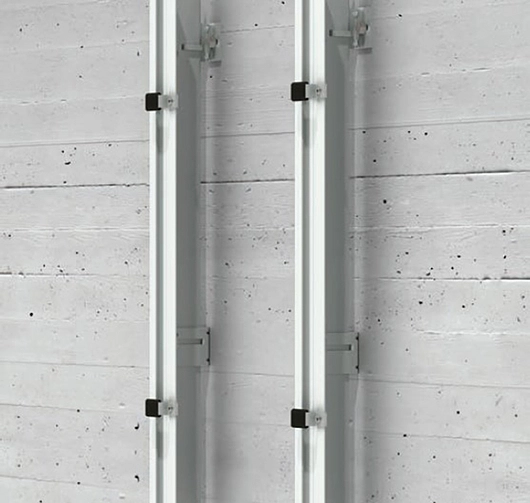
Profiles
- Place first profile and check vertical levelling
- Fasten the profile with self-tapping screw/s at fixed point (Profile T -only one side, Profile Omega - on both sides), use level again to check the verticality of the facade.
- Fasten remaining spacers at expansion points and place remaining master profiles (ends of each flat surface)
- Attach and run a string from each end along the profiles, for profile levelling.
- Using the string as a guide, place the remaining levelled substructure horizontally on the front.
The next phase depends on the assembly system of the composite panels:
STACBOND® Assembly System - Composite Panels
Four product variations of composite panels are available for both substructure profiles.
Composite panel System Types
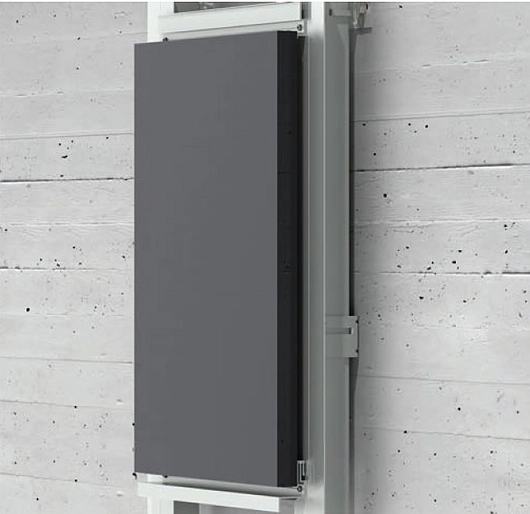
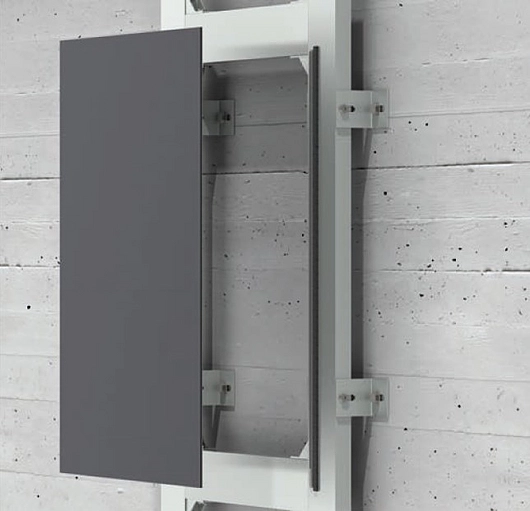
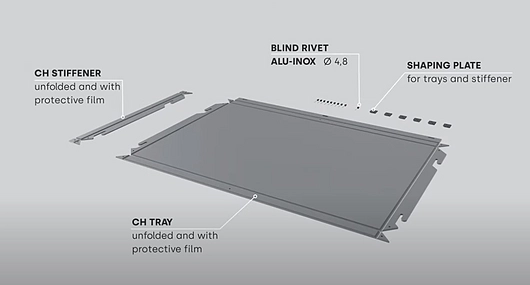
1. Hanging System (STB-T-CH; STB-CH)
a kit system based on hanging cassettes from STACBOND® composite panel for the assembly of ventilated facades. It is a hidden fixing system, versatile and fast assembly, in which the modulations of the cassettes can be both horizontal and vertical.
Finishing off Substructure
Hanger Supports
- Use laser level to find setting out point for hanging spots of the composite panels.
Fasten hanger supports, placing the rest on all profiles at required distance.
Panels
To assemble the kit
- Fold side tabs, folding the longest side first, you will see a protective film covering the panels.
- Peel films to 90 degrees from folded panel, cut the film without touching the panel.
- Fasten the shaping plates at the inner corners with rivets.
- Fold the stiffener to the required shape, fasten shaping plates at the outer corners with rivets.
- Clean part of panel where double sided adhesive needs to go (centrally on the interior side), with Sika cleaner 205 or similar and leave to dry for 10 minutes in sun.
- Apply double-sided adhesive tape and Sikatack Panel, or a similar adhesive and place the stiffener on the adhesive, and fasten it with rivets. Lacquered rivets with the tray's finish.
- The Tray is ready to be fixed to the substructure.
Attaching to Substructure
- Bring the tray closer and move it downwards until it is set in hanging system.
- Use a leveller to check the tray is level hrozontally.
- Fasten tray with self-tapping screws.
- When placing other panels, use spacer in between panels to maintain footprint. Placing the rest of the trays in a horizontal row at the bottom of the facade.
- Complete the facade row by row, checking the flatness of the front.
- Place the rear top profiles and apply elastic adhesive and double-sided tape, place and fasten top piece and fasten it on the front.
- Place double-sided tape and adhesive strip over the framing profiles around openings. Fasten the window's finish pieces, seal the framing with sealant.
- Peel off protective film and done.
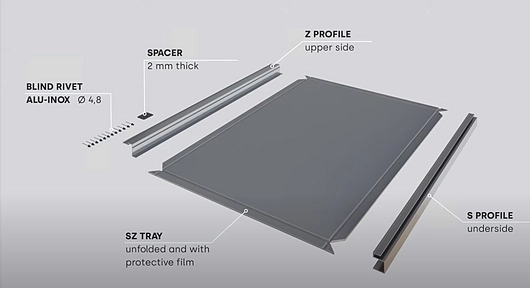
2. Male-Female System (STB-T-SZ; STB-T-SZ)
a kit system based on cassettes made of STACBOND® composite panel for the assembly of ventilated facades. It is a male-female system of hidden fixation, versatile and fast assembly specially designed to develop facades with horizontal modulation with predominance of blind parts and/or little surface of hollows or linear hollows.
Finishing off Substructure
Base Profiles
- Place the base profile along the bottom of the substructure, check horizontal levelling and fasten.
- Place anti-vibration element along base profile, maximum distance of 600mm apart.
Panels
To assemble kit
- Fold side tabs, folding the longest side first, you will see a protective film covering the panels.
- Peel films to 90 degrees from folded panel, cut the film without touching the panel.
- Position the S profile at the correct end, drill into the S profile through the tab perforations and secure the intermediate points of the tab with a rivet (maximum distance 500mm).
- Repeat the previous step with the Z profile at the opposite end.
Attaching to Substructure
- Place the first tray onto substructure and level on both vertical and horizontal axes.
- Make a groove on the male profile and fasten with a self-tapping screw.
- Add the next tray to the row and use a 10mm spacer for the footprint, place the rest of the trays in the row.
- Complete the facade row by row, checking the flatness of the front.
- Place the rear top profiles and apply elastic adhesive and double-sided tape, place and fasten top piece and fasten it on the front.
- Place double-sided tape and adhesive strip over the framing profiles around openings. Fasten the window's finish pieces, seal the framing with sealant.
- Peel off protective film and done.
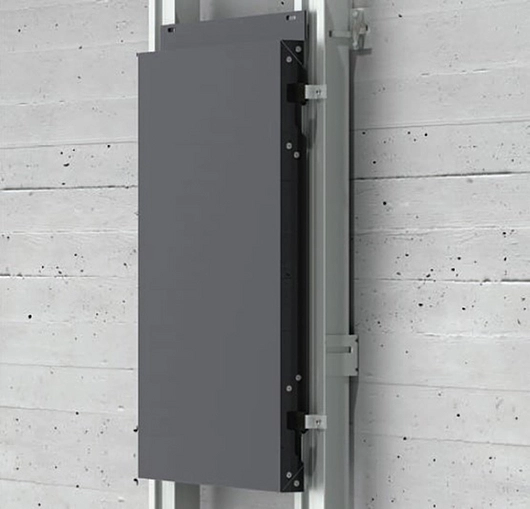
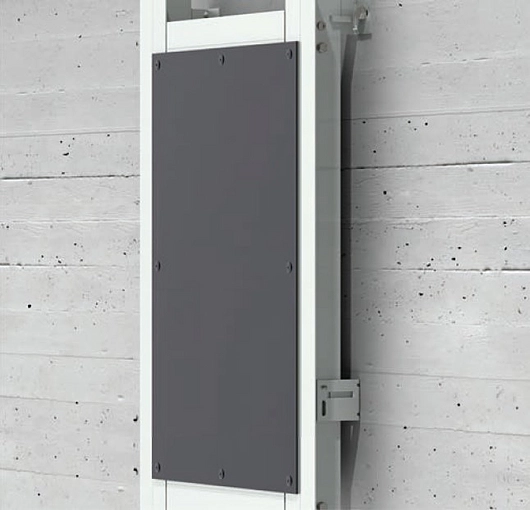
3. Riveted System (STB-T-REM; STB-REM)
a kit system of panels made of STACBOND® composite panel for the assembly of ventilated facades. It consists of a system with visible fixings and quick assembly, which admits both horizontal and vertical modulations. It is a very versatile system that adapts perfectly to any architectural typology and offers the possibility of easily executing curved areas.
Finishing off Substructure
Angles
- Place angle at the end of the wall as edging for panel parts.
- Complete both ends of the facade by adding the rest of the angles vertically above at set distance.
Panels
This panel comes pre-assembled.
Attaching to Substructure
- Remove film from around the riveting points on the panel.
- Position the panel against the substructure, supporting it with wedges.
- Level the perimeter of the panel both horizontally and vertically.
- Drill into the profiles from the panel at the fixed-point holes in the panel with a 4.8mm bit.
- Load the riveter with a wide-flange rivet with the head lacquered in the color of the panel and rivet on the fixed point hole.
- With the centering piece on the drill, bore the remaining expansion points and rivet the expansion point.
- Repeat the process on the entire sheet.
- Position the horizontally adjacent tray, using spacer to maintain the footprint
- check horizontal and vertical level, rivet and remove wedges.
- Place the rest of the trays in the row.
- Complete the facade row by row, checking the flatness of the front.
- Place the rear top profiles and apply elastic adhesive and double-sided tape, place and fasten top piece and rivet it on the front.
- Place double-sided tape and adhesive strip over the framing profiles around openings. Fasten the window's finish pieces, seal the framing with sealant.
- Peel off protective film and done.
4. Glued System (STB-T-PEG; STB-PEG)
a kit system of panels made of STACBOND® composite panel for the assembly of ventilated facades. It consists of a system with hidden fixings and quick assembly, which admits both horizontal and vertical modulations.
This panel comes pre-assembled.
Attaching to Substructure
Once the substructure is in place, the STACBOND® panels are attached to it using double-sided adhesive tape and adhesive, following the manufacturer’s instructions.