D5 Lite for Revit integrates AI-assisted visualization and real-time rendering into the Revit modeling environment. It can be used during schematic design and design development to explore visual directions, evaluate materials and lighting, and review design changes while the BIM model continues to develop.
The workflow can be organized into four stages: model, explore, verify, and polish.
1. Install D5 Lite for Revit
| |
| D5 Launcher installation and login screen for the D5 Lite Revit real-time rendering plugin |
Open D5 Launcher and navigate to Workflow > D5 Lite > Revit, then select Install. If Revit is running, close it before completing the installation.
D5 Lite currently supports Revit 2019–2027 on Windows. It requires an NVIDIA RTX 20-series GPU or later, GPU driver version 528.33 or later, an internet connection, and a D5 account.
After installation, open a Revit project and select the D5 Lite tab. Click the D5 Lite button to open the rendering window connected to the active Revit model.
2. Explore Design Directions with AI Mode
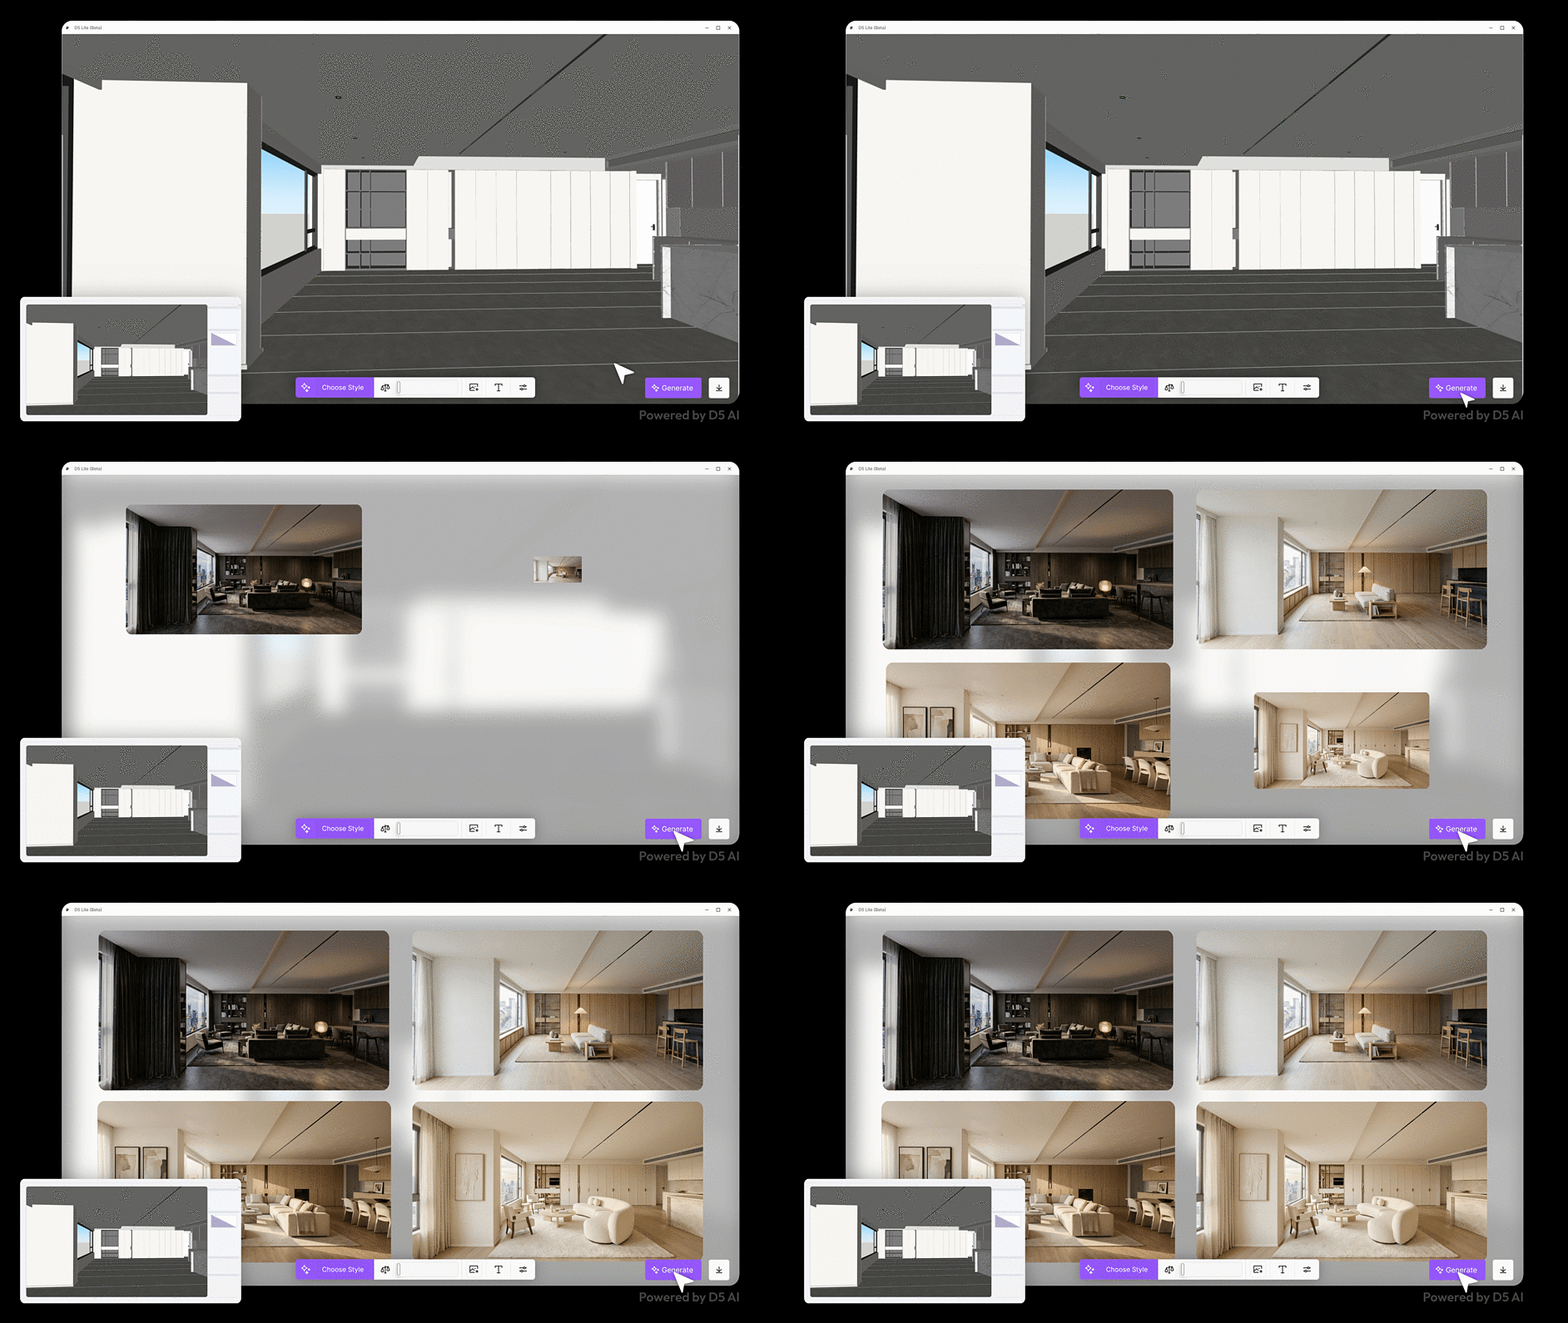
During early design stages, switch to AI Mode to generate visual studies from the current Revit view.
| |
| D5 Lite AI Mode generating interior design variations directly from an active Revit rendering view |
Select a Style Preset or use a text prompt to define a design direction. A reference image can also be added to guide the visual language. Use Structure Weight to control how closely the generated result follows the original model geometry.
Up to four variations can be generated at once, allowing different material palettes, façade treatments, interior styles, or contextual directions to be compared before detailed visualization settings are established.
AI Mode is intended for design exploration rather than physically based visualization.
3. Verify Materials and Lighting with Render Mode
Once the design direction becomes more defined, switch to Render Mode for real-time path-traced visualization.
| |
| Adjusting sun and lighting settings in real time using D5 Lite Render Mode for Revit |
Apply and adjust physically based materials, then configure the environment using sky, sun, or HDRI settings. Artificial lighting can also be adjusted within the D5 Lite interface.
Use the rendered view to review conditions such as daylight entering an interior, material roughness and reflections, façade finishes, or lighting relationships.
Continue editing the BIM model in Revit as required. Geometry changes synchronize with D5 Lite, allowing the updated design to be reviewed without creating a separate visualization scene. Material and lighting configurations are stored with the .rvt project.
4. Repeat the Model–Visualize–Adjust Loop
Visualization can be repeated throughout design development rather than reserved for the end of modeling.
For example, adjust a wall, ceiling, façade, or room layout in Revit, review the result in D5 Lite, refine materials or lighting, and return to the model when further changes are required.
This creates a continuous model → visualize → adjust workflow within the active Revit project.
5. Continue the Project in D5 Render
| |
| When the project requires final production output, transfer the scene from D5 Lite to D5 Render. |
Materials, lighting setups, environmental adjustments, and supported proxy models can carry into D5 Render. The scene can then be developed further for high-resolution still images, animations, immersive walkthroughs, or Interactive Presentations without rebuilding the visualization setup from the beginning.