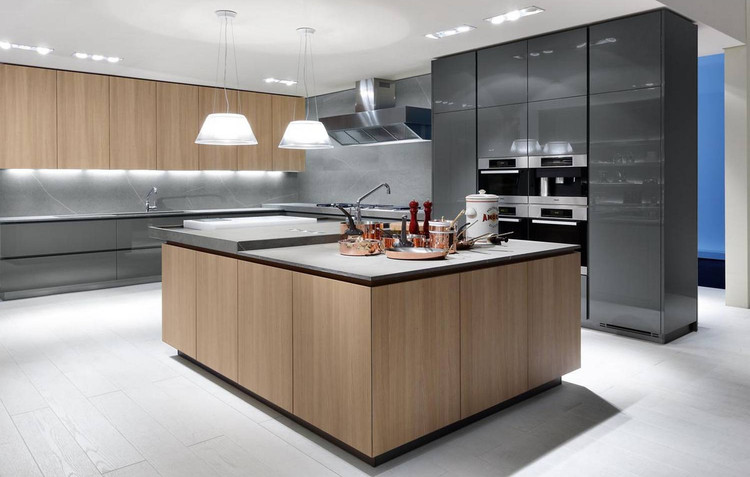
How to Correctly Design and Build a Kitchen

How to Correctly Design and Build a Kitchen

Before starting the design process, the most important thing is to understand how the kitchen is going to be used. This is a basic approach that any architect must take. A kitchen can’t be just a leftover space or a space to be defined at the end of a project. Designers must understand that a kitchen has various flows and different work areas that need to be integrated throughout the entire project.

Beyond the style or design requested by the client, it’s important to define a module to optimize performance and minimize the manufacturing costs of the different pieces. This way, measurements of all the components of a kitchen are set before defining the space that will house them.

Workspaces and Flow

There are a number of studies that have defined 5 general areas in a kitchen:

  • Pantry area: food storage space, canned goods, refrigerator
  • Storage area: appliances, utensils, cookware
  • Sink area: cleaning area
  • Preparation area: ideally a large counter space to work on
  • Cooking area: stove and oven.

The pantry, sink, preparation and cooking areas are permanently combined and related to the process of preparing a meal in the most efficient way possible. The sink, preparation and cooking areas produce a narrow triangular work area, which leads to different types of kitchens.

Courtesy of Arauco

Types of Kitchen

This is related to the space that the design is intended for. The most commonly used types include:

  • Linear (or two parallel lines)
  • L-shaped
  • U-shaped

In relation to these configurations, it is important to understand how the different flows of movement work. The “work triangle” should be kept smooth, avoiding crossing movements when more than one person is working. At this point it is always good to ask yourself “How would I like to use my own kitchen?” or “What do I like or dislike the most about my current kitchen?” This way we can design our spaces with more sense.

Courtesy of Arauco

Modulation

At the beginning of the design and development of the floor plans, you should remember that the kitchen is not just a random binding of a series of furniture and appliances, but is made up of modules that must follow a manufacturing logic. If the design is not clear or doesn’t follow certain reasonable building parameters, it can generate conflict between the architect and the furniture manufacturer.

Therefore, the floor plan must be directly related to the upper areas of the room, and any appliances that are incorporated into the project must match the modulation.

A module consists of the following elements:

  • Lower Module: 1 bottom / 1 back / 2 sides / 1 shelf / 1 or 2 door / base / frame bars
  • Upper Module: 1 bottom / 1 back / 2 sides / 1 top / 1 shelf / 1 or 2 doors / frame bars
  • Tower Module 1 bottom / 1 back / 2 sides / 1 top / series of shelves and doors / base

Courtesy of Arauco

To avoid problems, modulation should be a design condition that way no appliances can be placed incorrectly. The appliances must be fitted into a single module, to avoid placing them between two different modules. For example, you can’t put a dishwasher, an oven or cooktop in between two modules. If this is done, you won’t have anywhere else to place them (since there wouldn’t be support), and that makes installing other elements like plumbing and electrical conduits more difficult.

Courtesy of Arauco

One of the biggest mistakes during the designing process happens while looking for symmetry. For example, when designing a base cabinet architects tend to draw vertical lines to indicate a separation of a module and its doors. Different sized parts are left between them in order to find symmetry.

It is essential to understand that the more times you repeat the exact measurement of the module, the easier it will be to construct and install the cabinets. The standardization of measurements is 100% related to the cost that the final project will have and is the difference between a project that’s doable and one that isn’t.

Standard Dimensions

Measurements are always related to the appliances and, in some cases, with the hardware available on the market with measurements that were already designed to fit kitchen furniture.

Width

The standard widths of a module are variable and depend on the use that each module has. Usually, they tend to work in round measurements 30cm, 45cm, 50cm, 60cm, 75cm, 80cm, 90cm, 100cm -- all measures are considered to be from outer edge to outer edge of the module.

When thinking about the appliances, the modules are generally 60cm and 90cm for microwave ovens, cooktops, and exhausts. An oven, for example, measures a little less than 60cm and is designed to fit neatly into a 60cm gap including the sides. In the case of the sink, it depends on the drilling that you need to do on the counter and if you’re going to mount the sink above or below the countertop. There are models of sinks ranging from 30cm to 90cm wide. The gap between the module and the appliance must be a few extra centimeters. It doesn’t matter if the strain-board section of the sink is supported by one or more modules if it is mounted above the countertop.

The hardware you wish to use will also have an impact on the width of a module. Hinges are used mostly on modules with doors while drawers require drawer slides. The hinges can really impact the module width. In the case of drawers, the hardware also defines the width of the drawer. Traditional drawer slides are made for drawers in sizes of 40cm, 50cm or 60cm, while more advanced drawer slides allow for drawers up to 120cm in width. It is important to understand that the more advanced drawer slides, like soft close ones, cost more so it’s recommended to use the longest ones possible. There are other types of accessories that can make a kitchen appear more stylish, like spice racks (15cm to 20cm), organizers (40cm to 60cm), dish racks (hanging units 40cm to 85cm) etc.

Depth

Base modules have a standard depth of 60cm. This measurement takes into consideration that the sides have a width of 58cm and adds another 1.8cm for the width of the door. The countertop should always exceed the measure of the depth of the module so that if something is spilled on the counter, the liquid does not drip directly onto the wood. The depth of the module may decrease for spaces that don’t include appliances. However, we do not recommend decreasing depth as it generally applies to kitchen solutions that weren’t well thought out to begin with. 

In the case of upper modules there are two different sizes to work with: 30cm or 35cm, both serve different intended purposes. When using a built-in microwave design it is important to remember that the bottom should be at least 35cm, in order to leave some extra room. In the case of a module using a depth of 30cm for the microwave, the bottom should extend at least 5cm.

For towers, it is recommended to use the same depth of the base, ideally 60cm. When considering an oven within the tower, it must be exactly 60cm deep. It is important to keep in mind that the oven needs a space of about 10cm going all the way up to the ceiling to allow for the heat to be released in the back. Currently, there are ovens that do not require this opening so it is always important to check the specifications of each device before considering the design of the module.

Courtesy of Arauco

Height

For the base modules, the height is generally 90cm from the floor to the countertop. The modules must never have direct contact with the floor due to moisture, with the allotted space being between 10cm and 15cm. There are series of adjustable legs on the market that allow adjustments for floors that are not 100% level. These can ultimately be closed with a baseboard, which tends to be a piece of chipboard or plywood covered with formic. The baseboard must have a recess of at least 7.5cm from the edge of the doors. There is the option of leaving the legs in full sight but it isn’t recommended because that tends to be a place where dust accumulates.

In the case of the upper modules, these are anchored to the wall and must be placed at a height of 1.40 - 1.50 meters from the floor. This measurement is 100% related to the depth of the base module. The lower the depth of the base, the greater the recommended height of the upper modules. This creates a workspace where the top module is not an obstacle. It is important to consider the recommendations of the air exhaust using it in the project, as each one has a specified volume of air extraction that is dependent on its distance from the counter.

Courtesy of Arauco

Materials

Like the appliances, all products and materials have a standard size and this is essential for getting the best possible performance out of them.

Shelving and Doors

Prism TFL is the main material used for the construction of kitchen cabinets and it is also used to make shelves and doors. It is a very efficient material, as its estimated lifetime is longer than that of the kitchen itself, ranging from 10 to 15 years. A cabinet structure can be manufactured using melamine 15mm thick, while for doors the recommended measurement is 18mm thick. This thickness works better when making holes for the hinges. If you want to prolong the life of a kitchen, you can make a design that allows for change only to the doors while keeping the structures. This way you can update the look of the kitchen at a lower cost.

Courtesy of Arauco

Countertops

There are several types of materials for countertops. The most commonly used are:

  • Laminate: the bare counter is covered with a sheet of high-pressure laminate
  • Stone: the most commonly used types are quartz, granite and marble
  • Other: materials generally derived from a compound such as acrylic

Current trends point to making countertops as thin as possible so stones and acrylic products like Staron have shown to be very popular since they have a thickness ranging from 0.8cm to 1.5cm.

Courtesy of Arauco

Baseboards

In this part of the cabinet, it’s best to have a product with increased resistance to moisture, like laminate covered plywood. Another option is to add metal or plastic accessories made by hardware companies.

© Rehau

Modules or Adjustable Parts

When you have a kitchen cabinet set between two walls, you have to leave extra room. This is because construction never ever ends up being the same size as the plan. These clearance spaces can be taken care of by using adjustable pieces ranging from 5cm to 10cm.

The use of these types of replacements can be avoided depending on how the kitchen has been designed from the beginning. For example, when designing a kitchen, the location of the refrigerator or dining area can help avoid these adjustable pieces, by just adding 5cm to 10cm to the space defined for the refrigerator or table. In this case instead of giving 70cm of space for a refrigerator, we leave 75cm.

Courtesy of Arauco

There are other cases where one is forced to use a fitting piece, like in an L-shaped kitchen. To avoid this it’s possible to develop a fair adjustment module in the corner. The module is left separated from the side wall by about 20cm and so after built, if it is less than projected, it will be only those 20cm of clearance that make up the difference. Don’t forget that these empty spaces will be hidden by the countertops.

Courtesy of Arauco

Trends

There are countless options available for kitchen finishes. The combination of colors and shapes are available in any desired material (melamine, ceramic, handles, appliances, etc.). Thanks to that, it isn't possible to have an unattractive kitchen, just a poorly made or planned one. Therefore, in terms of taste, it is important to listen and understand the customer in order to identify which style and image is the one that’s best for their kitchen.

Additionally, there are also small details that can make the difference between a modern and a traditional kitchen:

  • Thin countertops: this trend is repeated more and more at international design fairs that show cabinet thickness
  • Inset Handles: these make the doors look polished by avoiding the use of traditional handles. One option is the use of straight handles that are located on the edge of the door or automatic systems that open the door when pressed
  • New technologies: drawers 1 meter wide with hardware that holds the weight, or installing spice racks and visible dish racks are good examples of new technology. There are more and more kitchen accessories that allow for customization making each kitchen unique
  • Lighting: the use of LED lights incorporated into the cabinets for an integral solution
  • Design: Different Prism TFL laminate designs allow for styling and personalization of each piece. Through the new Nordic Contemporary line, it is possible to have a completely unique style through wood designs. With streaks, textures and natural wood-like appearance, a variety of colors from rustic to designs with a more Scandinavian feel, or the new unicolor that are able to match one another perfectly, for example. Likewise, a way to deliver greater value to a cabinet is to replace the traditional white for one of these new colors that highlight what is stored inside, like the dishes.

Courtesy of Arauco

Recommendations

1. Use screw protectors. These can be hidden with the use of wooden dowels. The process is slower and more expensive but leaves a better appearance.

2. Distancing the counter top from the cabinet is a trend. However, when doing this you should leave a large enough space (ideally 30cm or more) so that it is easy to clean. Tight spaces mean more wear and tear on the furniture from using wipes or a broom.

3. The baseboards must be made of more resistant materials. It is recommended not to use the same melamine as the cabinets since you won’t get the same lifetime use at floor level.

Courtesy of Arauco

4. The quality of the hardware is essential when creating quality furniture. Its life is measured in cycles and there are substantial variations between hardware of low and high quality. A good hinge determines whether or not the cabinet door will fall off.

5. When designing handleless furniture you have to use a certain logical order for opening the doors. Ideally, use double door modules and if there is a space for a module with a single door, put it in the corner.

Courtesy of Arauco

6. When using doors above appliances (oven, microwave) leave enough space for your hand.

Courtesy of Arauco

More details and related materials in the following link.

** Guide Developed by ArchDaily Guide and Arauco Specifications Area.

About this author
Cite: Materials. "How to Correctly Design and Build a Kitchen" 04 Jul 2016. ArchDaily. Accessed . <https://www.archdaily.com/789894/how-to-correctly-design-and-build-a-kitchen> ISSN 0719-8884

Courtesy of Arauco

如何设计并建造一座厨房

You've started following your first account!

Did you know?

You'll now receive updates based on what you follow! Personalize your stream and start following your favorite authors, offices and users.