The fundamentals of creating a Revit material are fairly straightforward; create a new material, assign a texture and render in Enscape. However, there are a number of additional options which can have subtle to profound effects on your results. This guide explores some options as they relate to making stone and masonry more realistic in appearance when creating still images, 3d panoramas or exploring in virtual reality via Enscape’s real-time rendering engine.
APPEARANCE ASSETS: IMAGE, RELIEF AND TINT
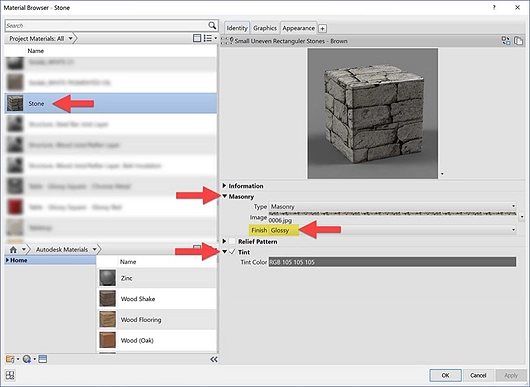
In the image below, a material is created and an image file selected for it. There is nothing wrong with this early on, while material selection is still fluid. However, at some point the materials benefit from adjustments to make them apear more realistic.
| Basic example with stone image used | Stone material image selected |
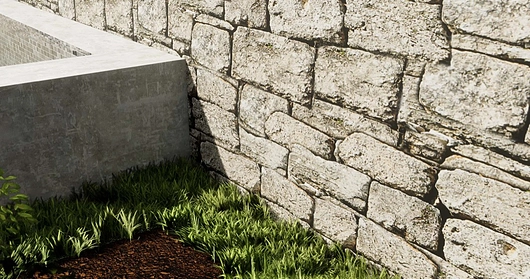 |  |
This material is called Stone and has a JPG image selected.
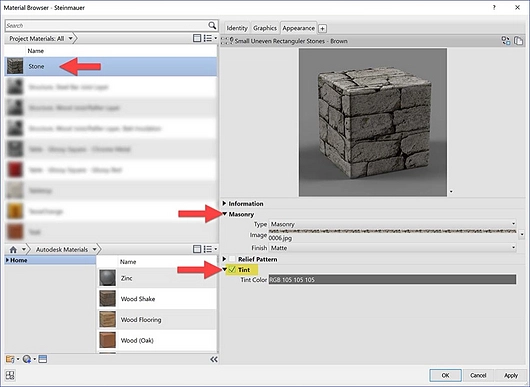
Because we are using an image file, the pattern and color are defined. If we want a slightly different stone color we need to either find another JPG file or use the Tint option. In our example, we tick Tint and modify the color. Notice, the result is a shift of the entire image, not just the mortar or just the stone.
| Tint color applied | Specifying a tint color |
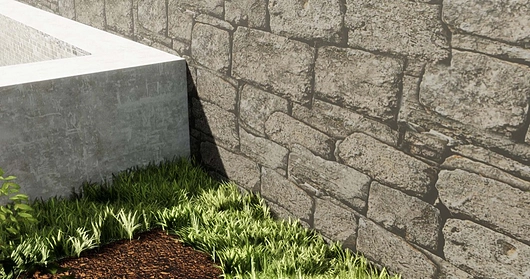 |  |
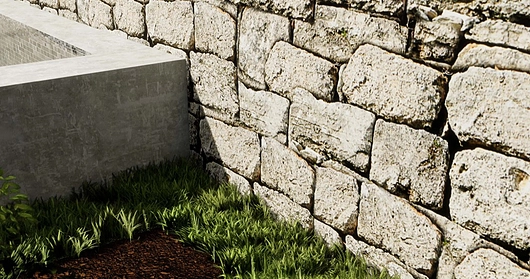
Another option, on the Appearance tab, is Finish. For masonry, we have Matte, Glossy and Unfinished. In the image below, the Glossy setting is not ideal as we can see a clear reflection of the adjacent pool and concrete wall. The stone is not reflective however, it did darken up the mortar joints.
| Stone wall with an unrealistic glossy finish | Applying a glossy finish to the stone material |
 |  |
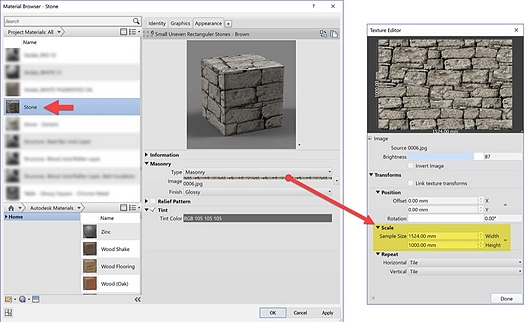
The scale of the stone or brick must be considered to ensure a realistic appearance. To verify the scale, click on the image preview. In the Texture Editor dialog, the Width and Height can be entered. The required values vary based on how much of stone/brick appears in the image. Click the chain-link icon to allow the two values to be modified independently.
| Adjusting the scale of the stone |
 |
| Stone with relief pattern applied | Selecting a relief pattern |
 |  |
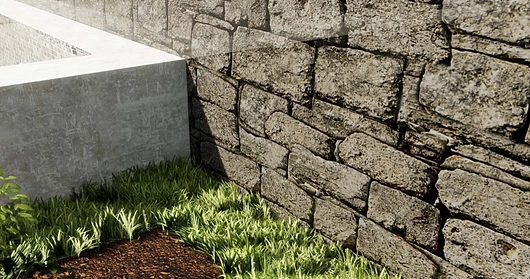
Back in Revit’s Material Browser, we can select an image and specify the Amount, which is “how much of depth do you want?”. The bump/relief image can just be the original image file, or, for better results, a customized version of the original.
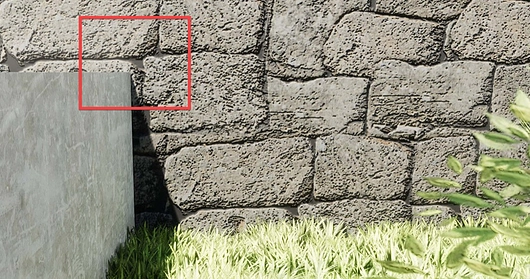
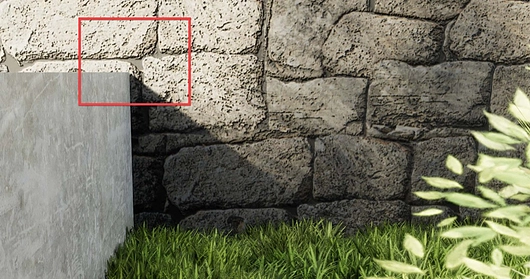
The next two images highlight the lighting effect within the material when the conditions change; in this case the time of day. The Revit wall is perfectly flush.
| Current sun angle | New sun angle |
 |  |
APPEARANCE ASSETS: BRICK
Another material that benefits from similar settings is masonry; Brick and CMU. We can see the shadow lines added for each brick relative to the directional lighting in the scene.
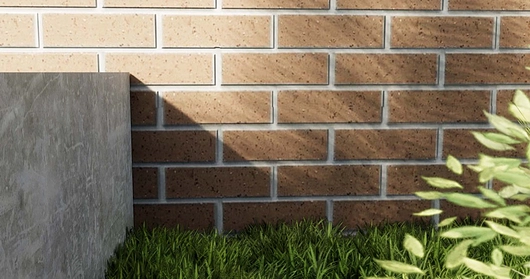
In addition to size, another important aspect of masonry is “coursing”: the vertical position of the material based on how it is built. Even if you don’t need this for construction documentation, consider applying a Model-based surface pattern to the wall (on the Graphics tab). Doing so allows you to reposition the Appearance Asset (i.e. the brick image) on the surface. Simply tab in to select the model pattern and then move/rotate it as needed within any non-realistic Revit view.
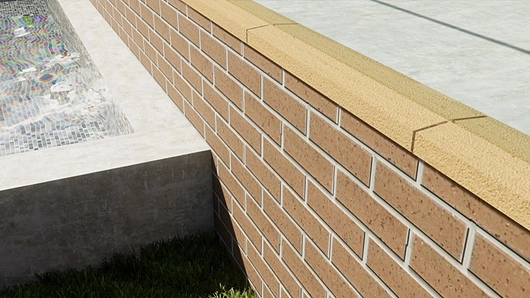
In the image below, the surface pattern was selected and moved vertically so a horizontal mortar joint aligns with the adjacent cast-in-place (CIP) concrete wall. When the Sun angle changes, the effect on the surface adjusts as well.
| Brick repositioned vertically | A different sun angle |
 |  |
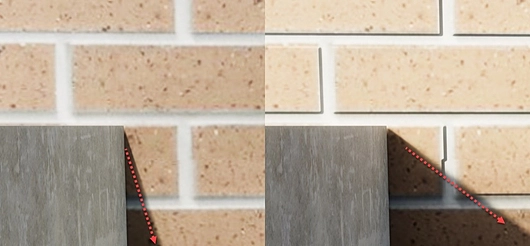
Here is another enlargement, based on the previous two images, to show the detail relative to lighting. Notice how the shadow appears to “fall” into the recessed mortar joint; compare the edge of the shadow to the straight edge of the red arrows!
| Brick detail from two sun angles |
 |
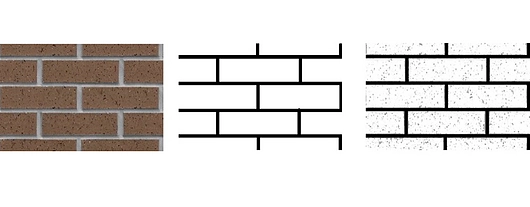
The next image shows the main brick texture on the left (a simple JPG file). To the right, are two options for bump/relief images; one just focuses on representing recessed mortar joints. The far-right option also highlights the imperfections on the surface of the brick. The nice thing about these two options, compared to just using the original image for the bump/relief pattern, is that there is much more contrast in the image. The way a bump/relief works is that the darker areas are recessed and the lighter areas are closer to unchanged – with white not changed. Thus, when using the original image, the ability to control depth is more limiting.
| Brick pattern image and relief pattern options |
 |
Using Enscape’s ability to animate daylighting, we can better understand the impact these settings have on a material.
If you did use the original image file for the bump/relief, you would want to use Invert Image via the Texture Editor (which is the same place where you can set the scale of the material). In this image, the mortar is lighter than the brick so the shade/shadow embellishments would not appear correct.
STONE JOINTS
An easy way to show clean and consistent joints, as seen in the next image, is to use Revit’s Cutout feature.
| Stone cap with joints |
 |
| Apply cutout image to define joints |
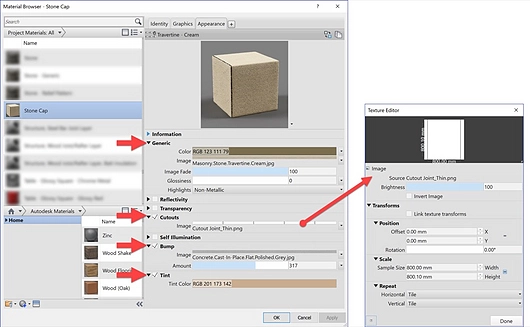 |
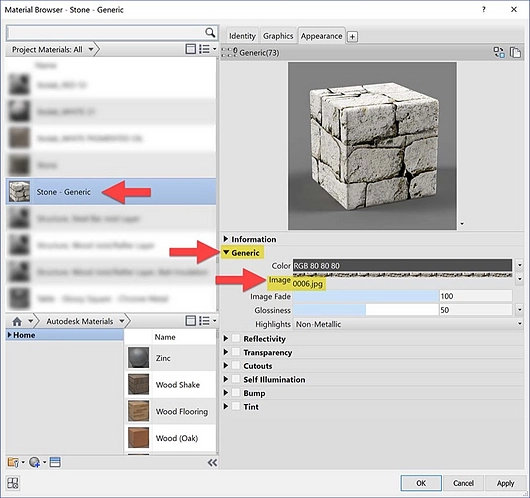
The Cutout feature is not available within the physically accurate Masonry material, so we must use a Generic one as shown in the image above on the right. Use the Replace This Asset icon in the upper right if you need to change that setting. The image selected is an all-white image with a solid black vertical line on the far right; this can easily be created in Photoshop.
CONCLUSION
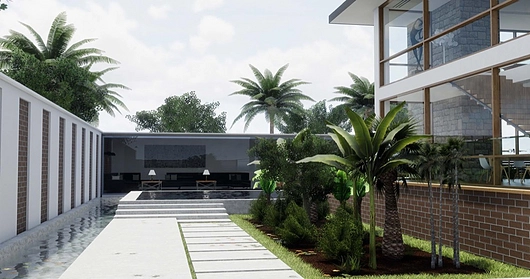
Here is the overall image with the brick and stone cap. From a distance, some of the detail may not be visible. But for close-ups and large, high-resolution images, this detail will come out and have a positive impact on the overall quality of the composition.
Please find the complete guide on Enscape's website.


